")
Product Description
WARNING: Due to the expansion properties of ROCKITE, do NOT use ROCKITE for anchoring in cement that is narrow on top such as handicapped ramps, concrete construction barriers or concrete walls. When using ROCKITE, always leave at least 4″ from the edge of the concrete to the hole.
Use ROCKITE for Anchoring:
- Bolts
- Posts
- Rods
- Railings
- Machines
- Motors
- Partitions
- Appliances
- Conveyors
- Racks
- Seats
- Deformed Bars
- Tilt Up Connections
Directions – How to Mix the Cement:
- Always use a clean container.
- NEVER add sand, gravel, or other foreign substances to ROCKITE. They weaken the cement and affect the setting.
Yield – Volume Calculation:
- 1 lb. ROCKITE Cement yields 18.75 cubic inches.
- 92 lb. ROCKITE Cement yields one cubic foot.
Fluid (Pouring) Consistency:
Mix ROCKITE with water to a thick paste. Let the mixture stand for about 1 minute, then stir thoroughly. At this point, the mixture will become more fluid. The proper consistency is more like a thick batter, just fluid enough to pour but NOT watery. Keep the mix thick. This makes stronger cement. Add water very sparingly. If the mix is thin, add more ROCKITE promptly to thicken it. If you wish to measure, the correct water addition is 4 1/2 oz. per lb. or 1 1/2 pints per 5 lb. box. When using this method, MEASURE ACCURATELY.
Plastic Consistency:
Add only enough water to make the cement form dry lumps. Keep mixing for 60 to 90 seconds. As the powder absorbs the moisture, the cement will begin to look like ordinary putty. This is the proper consistency. If you wish to measure, the correct water addition for the plastic consistency is 3 1/2 oz. per lb. When using this method, MEASURE ACCURATELY.
How to Anchor Bolts, Posts, Starter Rods, etc. in Concrete, Brick, and Stone:
- Drill the hole as required, never less than 2″ (50mm).
- Blow out all the dust and loose particles.
- Flush out hole with water. Be sure to remove excess water, leaving the hole clean and uniformly damp. (The substrate can be damp when ROCKITE is poured into the hole.)
- For anchoring machinery in concrete, use the fluid consistency (as above). Ensure that anchor rods have nut head and washer on before placing them in the opening. Pour the ROCKITE into the space around the rod/bolt. Tamp bolt to settle ROCKITE completely around the rod/bolt.
- For exterior anchoring of ornamental iron, pour the fluid consistency (as above) around the rod, tapping the rod to settle the ROCKITE.
- For anchoring in vertical walls, use the plastic consistency (as above). Fill the holes with the plastic cement first. Then, tamp the bolt or rod into place. If the cement becomes too fluid because of the tamping process and sags out of place, let it stand for a few moments and it will stiffen. Carry on with procedure.
- Let the cement harden for at least 30 minutes. Initial set is 15 minutes. For heavy equipment, allow 1 hour.
NOTE: DO NOT USE ROCKITE IN SWIMMING POOLS!!! ROCKITE IS FOR USE IN WATERPROOF CONDITIONS ONLY!!!
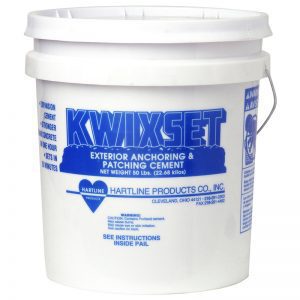
When used outdoors, ROCKITE should be allowed to dry out thoroughly for 7 days and then protected with a coat of good grade exterior paint. ROCKITE should NOT be used underwater or as a primary structural member. ROCKITE should NOT be used outdoors for anchoring in porous materials, such as brick, limestone, and granite, when they are exposed to wet conditions. For these types of applications, use KWIXSET.
How to Patch Holes and Cracks in Concrete Floors:
- Cracks should be raked out to remove any loose debris or loose particles. If a hole is to be repaired, chisel down the edges to provide a ‘form’ for the cement when it is poured.
- If the hole is clean, simply remove loose chips and dirt.
- Sprinkle the whole/crack with water. Leave the surface damp and not wet.
- Mix ROCKITE to fluid consistency (as above) for patching floors and plastic consistency (as above) for walls.
- Pour a little cement into the hole and scrub it into the surface with a stiff brush or broom to drive the cement into the pores. This helps the patch to adhere. Then, add enough cement to match the level of the surrounding surface. The cement will self-level.
- When the cement begins to thicken (about 10 minutes), smooth out any imperfections in the surface with a cement trowel.
- After 30 minutes, sprinkle the patch with water. Foot traffic and light trucking may be resumed immediately. For heavy trucking, allow 1 hour.
Freezing Temperature Application:
The aforementioned procedure described may be used safely at temperatures down to 25°F (-3.889°C). If the temperature is below 25°F (-3.889°C), keep the ROCKITE in a warm place before using. When ready to apply, mix the ROCKITE with warm water and keep the mixture in a warm area. As soon as the mixture begins to stiffen slightly (approximately 10 minutes after the water is added), pour the mixture quickly into place. The hardening process then creates heat and protects the ROCKITE from freezing. Do NOT add anti-freeze compounds to the ROCKITE mixture!
For ROCKITE specifications, download here.